I wanted to share with you, my story of how I became interested in and later joined Stampin' Up. My sister had a catalog party when my niece was little, 1998 or 1999 I believe. At the time, my sister lived in Maryland, and I lived in PA, and I wasn't able to attend the Demonstration. But my mom brought home the catalog for me to look at. Well, I wasn't overly impressed at the time, but I did get a few sets, all in FOAM! Yes Stampin' Up! sold foam stamps at one time!! Here's a picture of one below:
One of the sets that I had gotten was Dreams and Dragons.(The picture is in wood, but the one I bought was foam. Mine have since been unmounted):
Well, again I wasn't impressed, the image was rather small, (Stampin' Up has also come a long way in their images and selections! Keep in mind this was 11 years ago!) and so it went into a drawer and I didn't do much with it.
Flash forward a few years. We had a Demonstration here with a local gal, who actually said at the time "I don't make cards or Scrapbook. Someone designed this card for me. But you can make it however you'd like"!! I did place an order, and this time I got some cardstock. Real Red. I also picked up a few sets (in wood this time) again it went into the drawer. At the time I "didn't want to pay that much for Cardstock. I could get it cheaper someplace else!" Flash forward a few more years. Now I have children. And I don't get out much. I have stacks of paper and stamps and all types of stuff which I have collected and not done anything with. But I went to a Stamp Camp around Christmas time and I really enjoyed myself. I considered becoming a Demonstrator although I could "Never come up with ideas on my own"! Again I placed an order, but the Demonstrator, who shall remain nameless, almost acted as though I was a bother. Like my order didn't matter. Now granted, I was the only one who ordered, but it was during SaleABration so I was well over $300 in sales on my own! I decided to find a new Demonstrator. And found one in Colorado! I'm still not sure how that happened! It was then that I finally pulled out that original pack of Real Red cardstock....and fell in love! Every sheet of red was exactly the same color! (You can't say that with the packs of red in those big box stores!) And it's so thick!!! No more flimsy cards!!! Anyway I started seriously considering becoming a Demonstrator. I talked it over with my hubby who said "we don't have the money for the kit". (Party Pooper) Well thanks to President George W. Bush and the stimulus check back in 2007, we had the extra money! And I did exactly what Mr Bush asked, I put it back into the economy! With no offense to the Demonstrator in Colorado (thanks for understanding Joy!) I started looking for an Upline closer to home. I found my Upline, Claire through a friend at work. I called her and she was just the nicest person on the phone! I signed up not long after that. July 11, 2007 to be exact! Not long after that I was invited to a monthly meeting at Claire's house where I had met other Demonstrators in our group the PhillyInkers. At the time we were a small goup, but now we are a pretty good sized group! So big in fact that we had to split and have separate meetings!
I originally started out as being a Hobbyist Demonstrator. But within a year I had 2 Downlines! I now have 5 Downlines! They are spread around the USA in Pennsylvania, New Mexico, California, and Tennessee!
Now with all of that being said I love LOVE LOVE being a Demonstrator!!! I have met so many nice people all through the United States as well as a Demonstrator in Australia! And who could ask for a better job? Stamping and creating? LOVE it! And I still get nervous sometimes that maybe my creations aren't "Good enough". But that's okay! I have a great group of ladies that come to my home once a month to create cards during Card Club. And I hold Stampin' Up Clubs where a number of people agree to purchase a set amount each month and they take turns sharing the benefits of being Hostess.
In closing I'd like to share my first Swap as a PhillyInker. It was pretty plain. But at the time I was proud of it! Now I look back and I can see how far I have come as a crafter and Demonstrator! (and a photographer!)
So if you have ever considered becoming a Demonstrator, ask me! You don't have to be an artist, or some Super crafter! You don't even have to Demonstrate to anyone! You can become a Demonstrator merely for the discount! And trust me if I can do it YOU CAN DO IT!!!!!
So become a Demonstrator today and
"Share what you love, Love what you do!"
Wednesday, March 30, 2011
Tuesday, March 29, 2011
Saturday, March 26, 2011
"Make Up Your Own Holiday" Blog Hop
WELCOME to the March 26-27 Make Up Your Own Holiday Blog Hop!!
And now for the important messages: Karelj is offering an over-all blog candy for those who are hopping along with us. She thought it would be fun to have some holiday-themed candy for this hop--but, of course, made-up holiday items were hard to come by! She decided to do a whole bunch of *regular* holiday themed stamps for you to enjoy. From Fiskars, there is an assorted holiday set; there's an alphabet from All Night Media, a set of 100 plus clear stamps and a storage case from Family Memories, and 5 sets of clear stamps from various dollar bins in big box stores. How to win them? Follow along the blog trail, leaving a comment on each and every blog. On Monday, Karelj will ask her buddy Randy (random.org) to select a blog number (from the list), a day (Saturday is one, Sunday is two), and a comment number from that blog. Please make sure you have left a reliable way to contact you (email is best, in the safe format of **** at **** dot com ) so you can be notified by her personally. If you don't, she’ll have to select another winner.
You should have arrived here from Nicolette's Blog! If not you may want to start at Karel's blog. The object of today's blog hop was to create your on Holiday. Tye Dye has always been a part of my life. When I was a child I used to tye dye shirts all the time. Especially at Girl Scout camp in the summer. I always loved mixing up that big 5 gallon bucket of dye! That was back when your only choice of dye came in those little boxes of Rit dye. Now the craft store sell so many different kits with different ways to dye! There's the little bottles that already have the dye and you just add water (that's what we used), but there's also kits with strings that have dye in them and you just tye them on! My sister has a Tye Dye shirt that we teased her about because practically every picture I have of her over a 2 year span, she has the SAME tye Dye shirt on in every picture! LOL. My daughter dyed a shirt once at a Scottish Festival (what the two have to do with each other, I don't know) and she had lots of fun! So I decided one day when it wasn't that cold out that my children and I would go out back and dye some shirts. We had our pajamas on (which we kept on in case of a Dye emergency, after all who will see them in their pajamas?) and they slipped on their rain boots (again in case of a spilled dye emergency, easy clean up). Then they slid their art smocks on and out we went. I gave them quick instructions and let them dye their shirts. They had a great time! My daughter declared that we should do this all the time! So a new tradition was born!
Ok so here is what I came up with. My daughter and I painted coffee filters a while back and they have been in my closet forever. I finally pulled them out to use when I thought abut making a tye dye craft. We started out with plain filters, which we painted with watered down kids washable paint. Here's what one of them look like.
Then I adhered them to pieces of cardstock and just started creating. The first card, (which I used the layout that I have used before, CASED from Ilina Crouse). It features the now retired "Wow Flowers" set by Stampin' Up! I went with black and white accent colors since there was so much color already in the card.
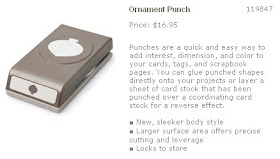
The next card I pulled out my 5-Petal Flower Punch by Stampin' Up and punched out some flowers. Then I took a retired punch to punch out the smaller flower. I stuck them all together using a large white brad. The vase is the Ornament Punch by Stampin' Up with the point trimmed off. I crumpled it up, and distressed it with shiny Versamark and Basic Black to give it a look of patterned glass.
The one flower I layered with Dimensionals. The stems are from Stampin' Up's "Greenhouse Garden" set. I added it all to a Z fold card and added some ribbon. Now I will say that this would NOT be ideal for Scrapbooking pages, since neither the filters. nor the paints are acid free, but I think they made some cute cards! Now I just have to figure out what I will do with the other pile of 15 filters I have still sitting here! LOL, that's for another day!!!
Next you want to hop on over to the wonderful Kathryn's Blog! Here's the list of Blogs in our hop in case you get lost along the way:
1. Karelj at One By One The Flamingos Are Stealing My Sanity at http://www.kareljcreations.com
2. Janice at Cricut Confessions at http://www.cricutconfessions.com/
3. Summer and Jennifer at The Cricut Diaries at http://www.cricutdiaries.com/
4. Denine at Pumpkin and Spice at http://pumpkinspiceblog.blogspot.com/
5. Colleen at Col’s Creative Corner at http://www.scrappycol.blogspot.com
6. Mistyrose at Sweet Magnolia Rose at http://sweetmagnoliarose.blogspot.com
7. Ellen at Card Monkey at www.cardmonkey-business.blogspot.com
8. Rachel at Suburban Crafter http://www.rachelstampshappy.blogspot.com/
9. Monica at Scraps 2 Treasure at http://scraps2treasure.blogspot.com/
10. Jen at Young’s Scrapping at www.youngsscrapping.blogspot.com
11. Becka at Creations With Becka at www.creationswithbecka.blogspot.com
12. Jamie at Glitter, Paper, Stamps, Oh My! at http://www.jamieisacraftymomma.blogspot.com/
13. Michelle at Peanut Butter and jelly Designs at http://peanutbutterandjellydesigns.blogspot.com
14. Celeste at Touched By A Butterfly at http://touchedbyabutterfly.blogspot.com/
15. Leah at Leah’s Card Designs at http://leahscarddesigns.blogspot.com
..."There is an error in Leah's line-up--please make sure you go to Calie after Leah at the blog address below!! So sorry!"
16. Calie at Calie’s Creative Corner at www.Caliescreativecorner.blogspot.com
17. Audrey at It’s A Beautiful Life at www.audreyscardsbydesign.blogspot.com
18. Bonnie at A Scrap Above at http://ascrapabove.blogspot.com
19. Diane at Crafting This Moment at http://www.craftingthismoment.blogspot.com
20. Nicolette at Beyond Scrapping at www.beyondscrapin.blogspot.com
21. Gina at Gina Thornton Stamping at http://ginathorntonstamping.blogspot.com YOU ARE HERE!!
22. Kathryn at Creations With Kathryn at http://www.creationswithkathryn.com/
23. Yolie at Just Yolie, Just Create at http://justyolie.com
24. Patti at Short ‘N Scrappy at http://www.shortnscrappy.com/
25. Krista Orr at Scrapaleupagus at http://www.scrapaleupagus.blogspot.com/
26. Kay Craig at 100 Things at http://kopperhead100.blogspot.com
27. Jane Hollon at Sneezy’s Ramblings at http://sneezy1956.blogspot.com
28. removed
Wednesday, March 23, 2011
Swaps for Spring Fling - In Wilderness
I seem to be on a masculine kick when making cards recently. Anyway I wanted this set "In Wilderness" by Stampin' Up as soon as I saw it in the catalog. I love the realistic looking wild animals that the images portray. As usual I tned to shy away from coloring those images so as to not take away from them. Instead I usually do a great deal of distressing on them. I started with a Soft Suede piece, layered with a Very Vanilla piece which I crumpled up and distressed with Crumb Cake (formerly Kraft) and Soft Suede classic Ink pads. I adhered the buffalo to a smaller piece of Soft Suede which I anchored down with three silver brads. In an additional effort to distress the piece, I rolled the one edge around a paint brush to give the look of a poster peeling off a wall. I really like how this one turned out. All masculine and natural looking. This is one more of the swaps I made for the PhillyInker's Spring Fling.
Tuesday, March 22, 2011
Swaps for Spring Fling - Faux Silk
These are another bunch of cards I made for Spring Fling. These also feature Tempting Turquoise. The flowers are from the Hostess Level 1 set "Because I Care"
(102118). And the sentiment is from the SaleABration set "Bliss" (123217 - Clear). Remember that the only way to get the SaleABration items are to earn them! You may choose one SaleABration set for free with every $50 purchase (prior to tax and shipping) If you are intersted, don't delay, they will only be available through March 31st! I added a 1/4" basic Black grosgrain ribbon. Then the sentiment is punched out with the oval punch (119855)and matted on the Scallop Oval (119856). The technique is called Faux Silk. You stamp your image on tissue paper, and then crumple it. Then you adhere to your cardstock with the Anywhere (104045) glue stick.
Monday, March 21, 2011
Have you ever...
Have you ever needed to make a card for a special occasion, or for someone special and just find yourself completely stuck?? Maybe it's just me. Maybe after all of the excitement of Spring Fling my mind is just on overload?? Friday night is my monthly card club. I have a few ideas floating around in my head, but nothing is definite. Problem is tomorrow night is dance class, Thursday I have a parent/teacher conference, followed by a quick dinner, and then training for work. My brother and his wife are due in on Friday evening and I still haven't a clue what I am doing!!! So stay tuned...I'm not quite sure what projects may become of this!
Swaps for Spring Fling - Choo Choo
I decided to use a color I haven't used in a while for my Spring Fling swaps. Actually, I can't officially recall ever using this color, but here it is. The base is Basic Black cardstock with Tempting Turquoise (102067)layered on top of that. I ran the Turquoise through my crimper (101618) to give it the texture. The small Basic Black piece is embossed with the Square Lattice embossing folder (119976). The engine, from Choo Choo (113982) is stamped in Tempting Turquoise Classic Ink
(100814). And the sentiment is from On Your Birthday (111664) is stamped in Black StazOn . I topped it all off with silver brads (104336).
Sunday, March 20, 2011
My Demo for Spring Fling
Sorry for the horrible picture, but sadly it is the only one I have. This is the project I made and demonstrated for Spring Fling. It features the Springtime Vintage Designer Paper (121782)as well as the "Baby Blossoms" (121927-wood) stamp set. The sentiment is from "You're a Gem" (122268-Wood) stamp set. All of these items are available until April 30th in the Occasions Mini Catalog. The background is Always Artichoke Cardstock. The label is stamped in Always Artichoke, and the sentiment is stamped in Rose Red.
Spring Fling PhillyInkers Style!
Yesterday I spent the good part of the day with a fabulous and creative group of ladies the PhillyInkers!! This is the Stampin' Up Downline group of Claire Lawrence. This is such a great group of ladies! I have been a part of this group for 2 and 1/2 years, since I joined in July 2011. When I joined it was a much smaller group! Now I am not even sure how many members of PhillyInkers that there actually are!!
Anyway we gathered together for the first PhillyInker's Spring Fling in Elmer New Jersey. We got together and swapped, talked, learned a little about our business, and crafted! In the first picture above, we are talking watching some Demonstrators demoing some different techniques, and swapping!
The second picture is of Karen Barber, and Michelle Zindorf. Karen is Claire's real life Aunt Karen as well as her, and Michelle Zindorf's Stampin' Up Upline. Both of these ladies are ULTRA Talented!!! I only can dream of one day creating cards like either of these two!!
This is our Fabulous Upline (who is only slightly pregnant, LOL. She's due in April) Claire Lawrence.
Below is the wonderful Max Conrad who came all the way from Utah to talk to us! She has the best neighbors....Stampin' Up! is right down the road from her home!
And here's one of my Downline members and friend, Michelle (standing with the "fairies" shirt) watching the talented Juliana Bibas demonstrating. Lynn Hunt and Megan Kearnty are in the background discussing fabrics.
And below our table is in the foreground. I have on the pink shirt, and my mom (and another Downline member) is in the blue next to me. (sorry small picture, I stole it from someone's album on Facebook!)
I did also create a project and demonstrate it for Spring Fling. However as far as I know, there are no pictures of me doing so. But I will post a picture of what I demonstrated in my next post.
Sunday, March 13, 2011
It's almost time!
It's almost time for another blog hop! The fabulous Karel at One by One The Flamingos Are Stealing My Insanity is hosting another blog hop! Don't forget to stop back March 26th and 27th to hop along and see some awesome projects and for chances to win some great blog candy!!