09 10

Saturday, June 18, 2011

June Card Club - Butterflies


Here was the other card that we made for Friday night's card club. It features Daffodil Delight and Basic Gray Cardstock. The Beautiful Wings embosslit folder, "en Francois" background stamp and Basic Rhinestones. If you are new to visiting my blog you don't know that I LOVE this background stamp. LOVE love love it. I stamped it in versamark ink on the smaller Daffodil Delight piece and then layered it all. Then I built the butterflies and added rhinestones. A nice simple, fast card. Although the butterflies took a while to cut and also a while to adhere the rhinestones. But in the end, worth it!


Are you interested in joining us for Card Club?? Why not check my website to see when the next Card Club meets:
http://www.stampinup.net/esuite/home/gina_thornton/
Can't make it here? Have a card club with you and your friends, you provide the location.

Tuesday, June 14, 2011

Baby Shower


My good friend from High School Rita is expecting her first baby very soon. I am so super excited for her, especially since we weren't real sure she would be able to have a baby. So she is very lucky! She is expecting a little boy they plan on naming Rickey, Richard after her hubby. I was so very happy that she invited me to her baby shower! I actually hadn't seen her since high school. You know how it is, life takes you in different directions. We have talked via letters and cards through the years, and reconnected on Facebook about a year ago. Anyway I made this card for Rita along with her shower gift (some super cute outfits with animal faces on the bum!) I used Crumb Cake (formerly Kraft) and Bashful Blue. Then I punched the star out using my soon to be retired Extra Large Star punch (retires June 30th, while supplies last). Then I punched out a piece of boy paper that I had and adhered it to the inside of the card. The sentiment is from the "Live Laugh Love" set which is also retiring June 30th. The ribbon is from last year, in Bashful blue (it's retired too).
I did get the idea from somewhere on the web, but not sure where at the moment.

Monday, June 13, 2011

Card Fronts - Wedding/Anniversary


My Card Front swap on my favorite MB is having a theme of Wedding/Anniversary coming up soon. I have seen variations of this card many places and knew I had to give it a try! The hearts I cut first with my Movers and Shapers Punch Windows. Then I punched some hearts out with my Full Heart Punch in both black and white. The white ones I debossed with my Perfect Polka Dots embossing folder by SU. The white background is also embossed with the Backgrounds 1 Texturz plates (although it is hard to see in the picture). I made a template for the V in the tuxedo and then used my 1/16" punch to make "buttons", the bow tie was made with a small piece ofsatin ribbon. The buttons on the dress were done with SU's Basic Pearls. I finished it all off with a black mat and strip and a sheer white ribbon. The girl heart is also popped up with Dimensionals.

Country Morning


I thought I would share the finished card that I made to show the simple knots below. This is for my card front swap on my Favorite MB, the theme is ribbons. I used a now retired Stampin' Up set called "Country Morning". I stamped the image on watercolor paper and used my Stampin' Up markers as well as Classic Ink pads and a blender pen to color the image. The cardstock, paper and ribbon are all stuff I had on hand.

Saturday, June 11, 2011

Tying simple Knots a Photo Tutorial

There was some discussion on tying bows and ribbons on my favorite MB. and I thought I'd make a photo tutorial of the way I tie my knots. I love doing them this way. No guess work! AND it uses less ribbon!!!

Step 1 cut a piece of ribbon long enough to fit your card with some to overlap:

Step 2. Adhere the overlap to the back of your card. I like to use masking tape, just to be sure it isn't going anywhere:

Step 3, slide a second piece of ribbon (still attached to the spool - or you can cut a second piece about as long as the first)under the ribbon:

Step 4 "fold" the top piece over the bottom of the "knot" part, a fellow crafter described this as what the Awareness Ribbons look like:

Step 5 tuck the tail of the top piece into the "hole":

Step 6 Pull ribbon tight. If you have a two sided ribbon, like I used, flip the top piece over so you can see the design before you pull it tight:

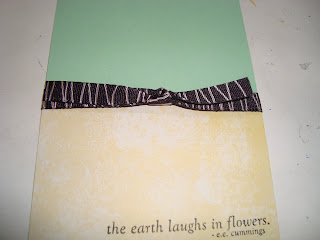
Here's what it will look like, You can make the tails of the knot longer or shorter according to your preference:

The part I love about this knot, is if the knot isn't where you want it, take a hold of one of the tails and slide it until the knot is where you would like it. If you want shorter tails, just trim them down. You can also pull the tails in a different direction if you'd like.

I hope this helps anyone who was having trouble!